
Installation Instructions
Installation is easy…here’s What You’ll Need
Cordless Drill
1/4” Drill Bit (use a nice sharp bit!)
5/32” Allen Wrench
7/16” Wrench or Socket
Tools for removing the front wheels (jack, jack stands, etc.)
Step 1
Clean out the wheel well area so you don’t have to fight with mud, dirt, and grime during the install.
STEP 2
Lift the front of the ATV and remove the two front wheels. This will give you room for maneuvering your drill and drilling the holes. Consult your manual if needed.
STEP 3
If your ATV has aluminum skid plates installed under the footwells, such those made by Perfex Industries, be sure to relieve any sharp edges that could unnecessarily wear the splash guards during use. This can be easily done with a hand file or sandpaper.
STEP 4 (Optional)
If you’re working in cooler temperatures, use a hair dryer to warm the splash guards ahead of installation. This will make them more pliable and easier to fit into their installation location which requires some bending and flexing.
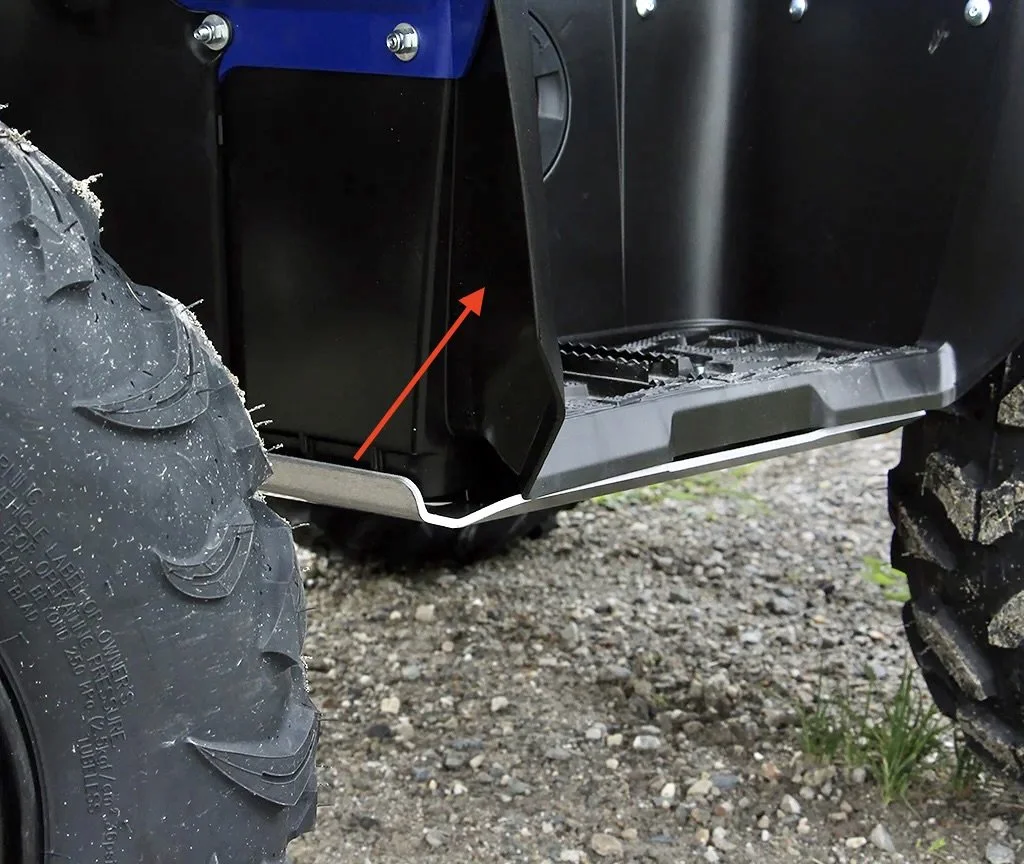
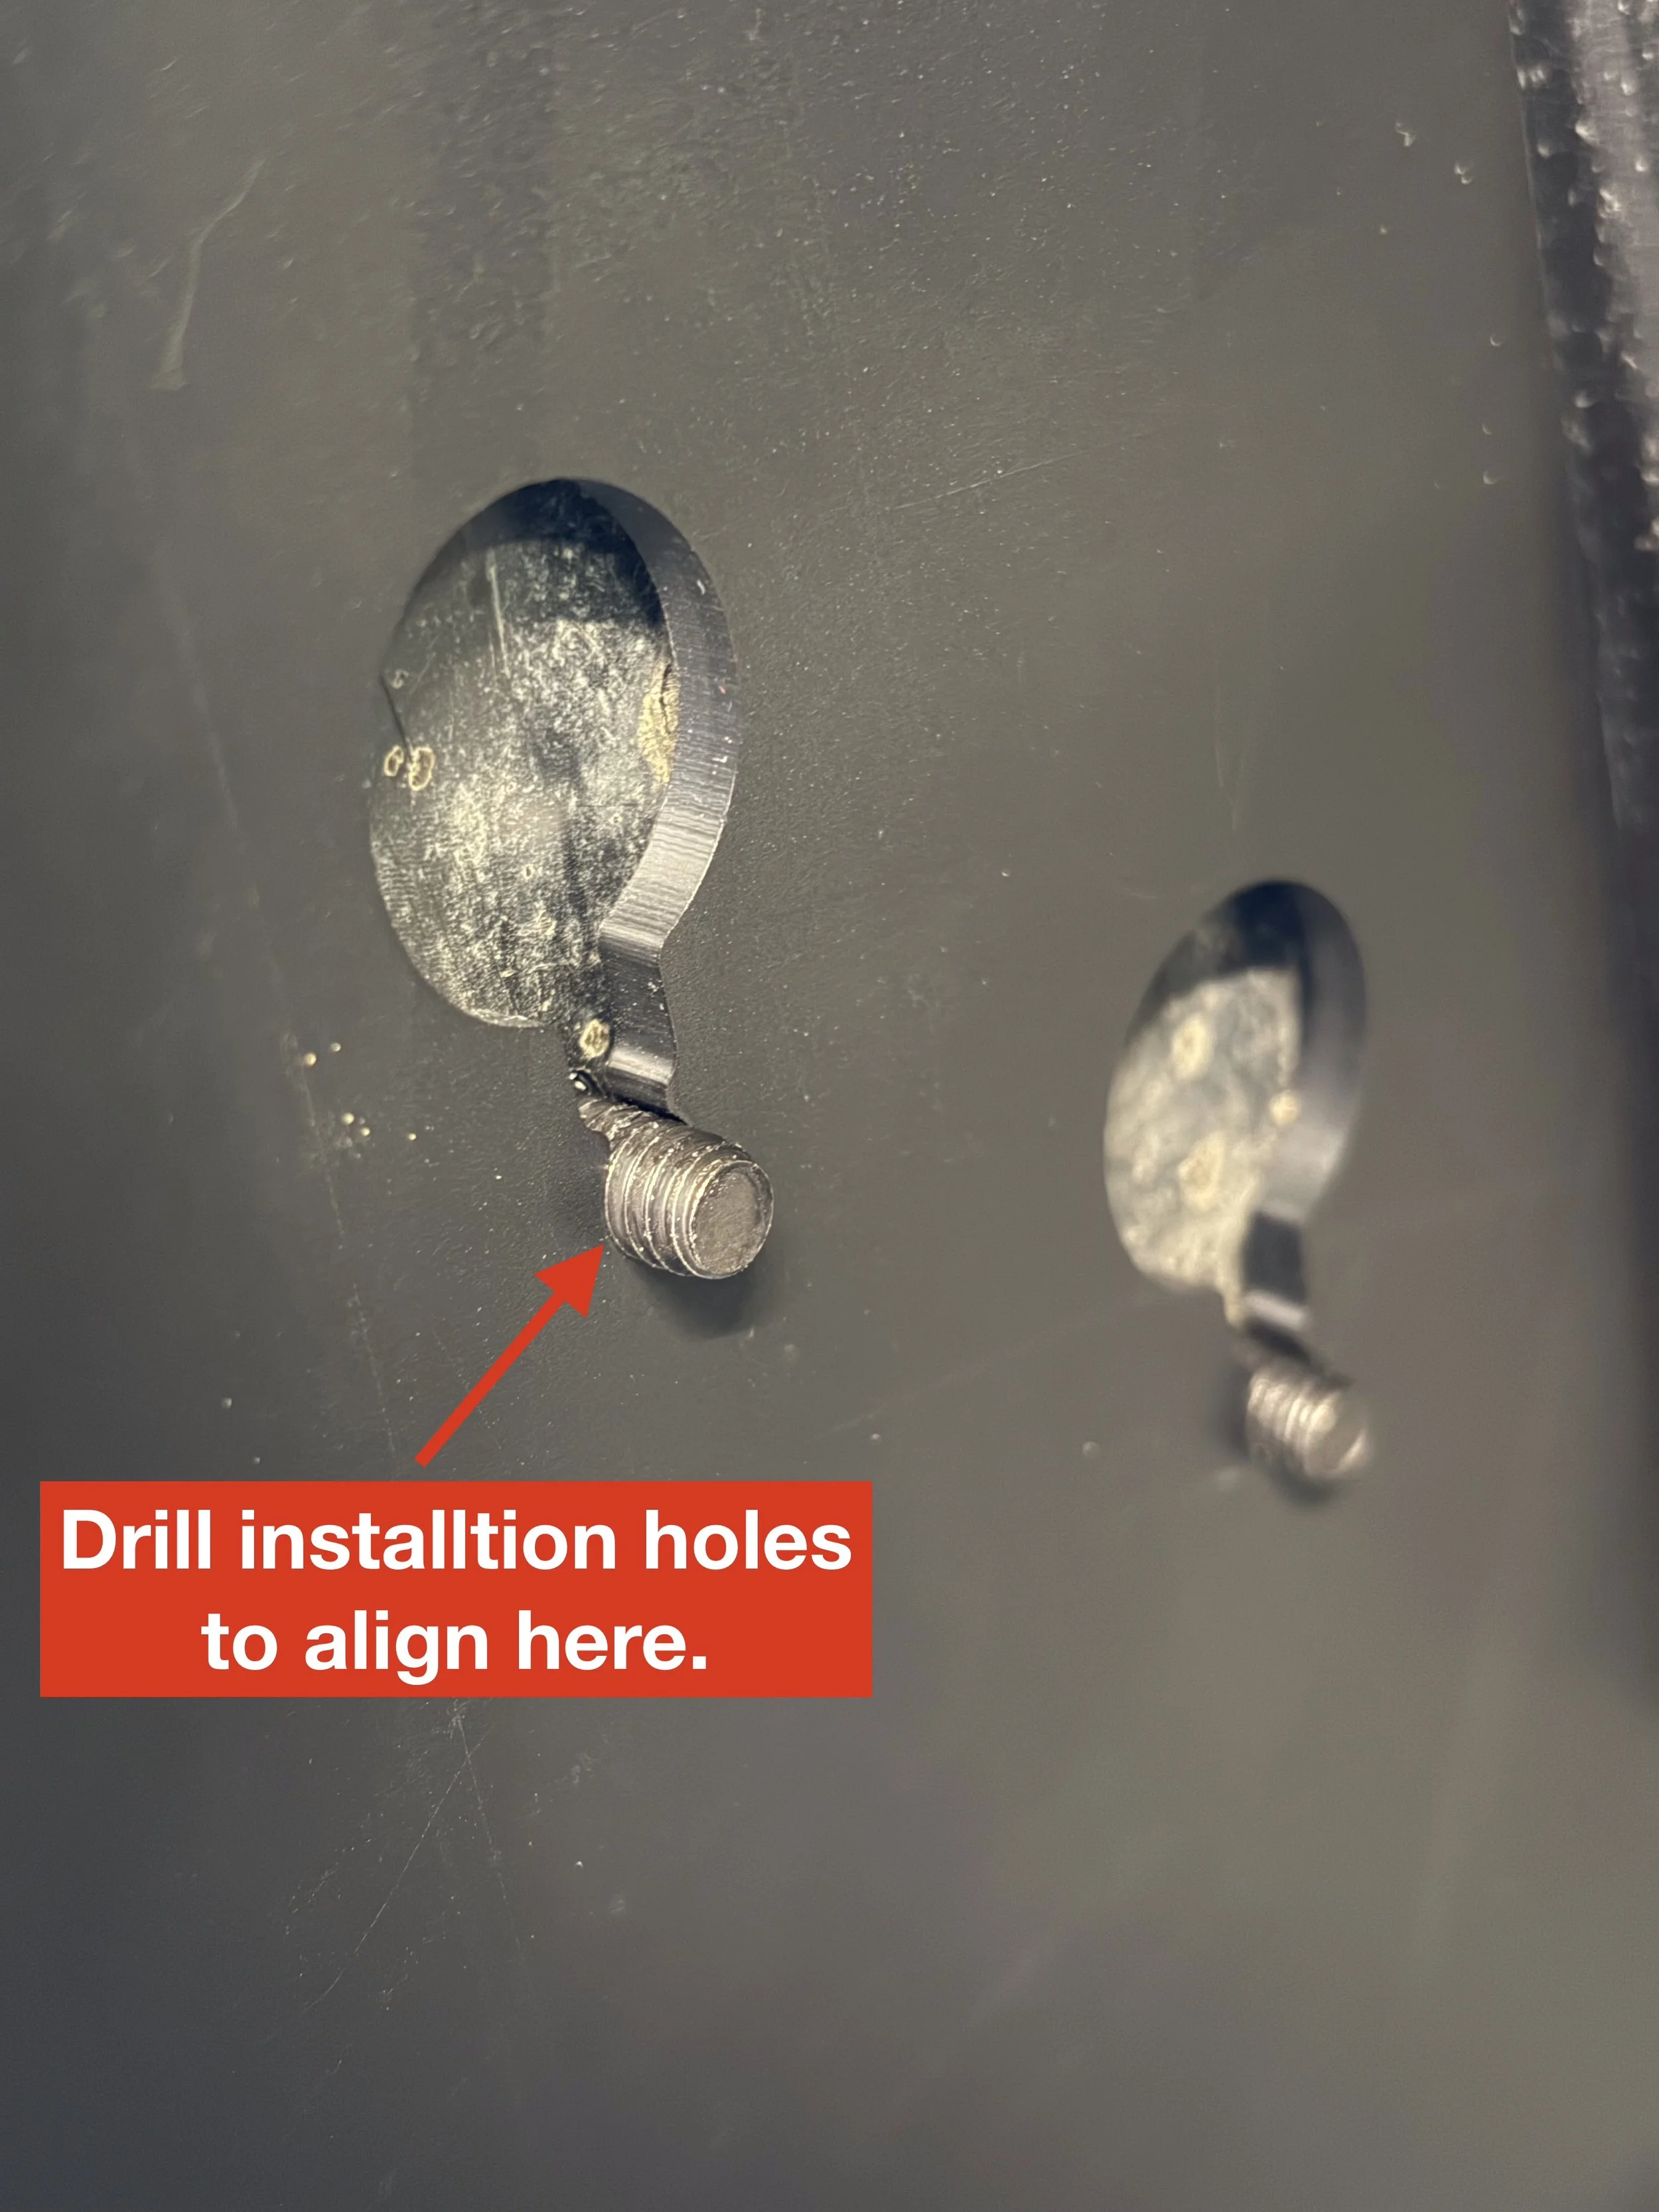
STEP 5
First, note that the splash guards are directional. One fits the left side of the ATV while the other fits the right side. Be sure the notched section of the splash guard is facing inward toward the center of the ATV as shown in the picture below. In addition, be sure the top edge of the splash guard is placed tightly against the lower edge of the fender (where the fender and footwells meet). This is also shown in the photo below.
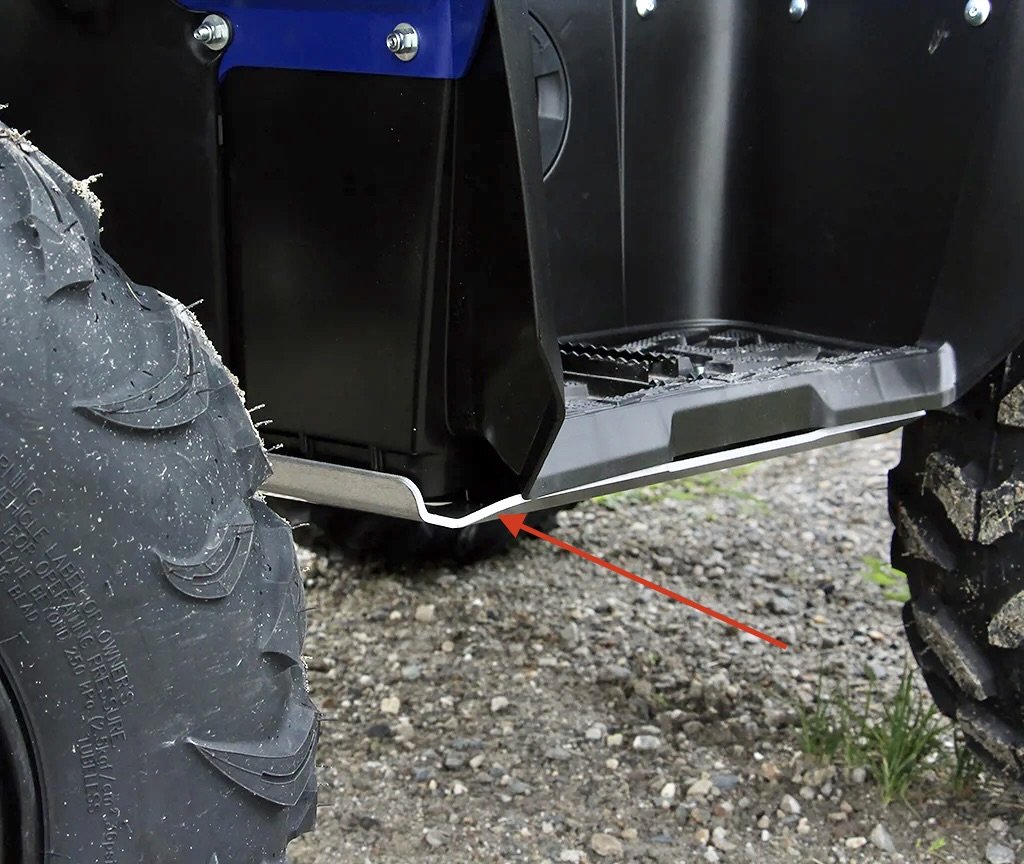
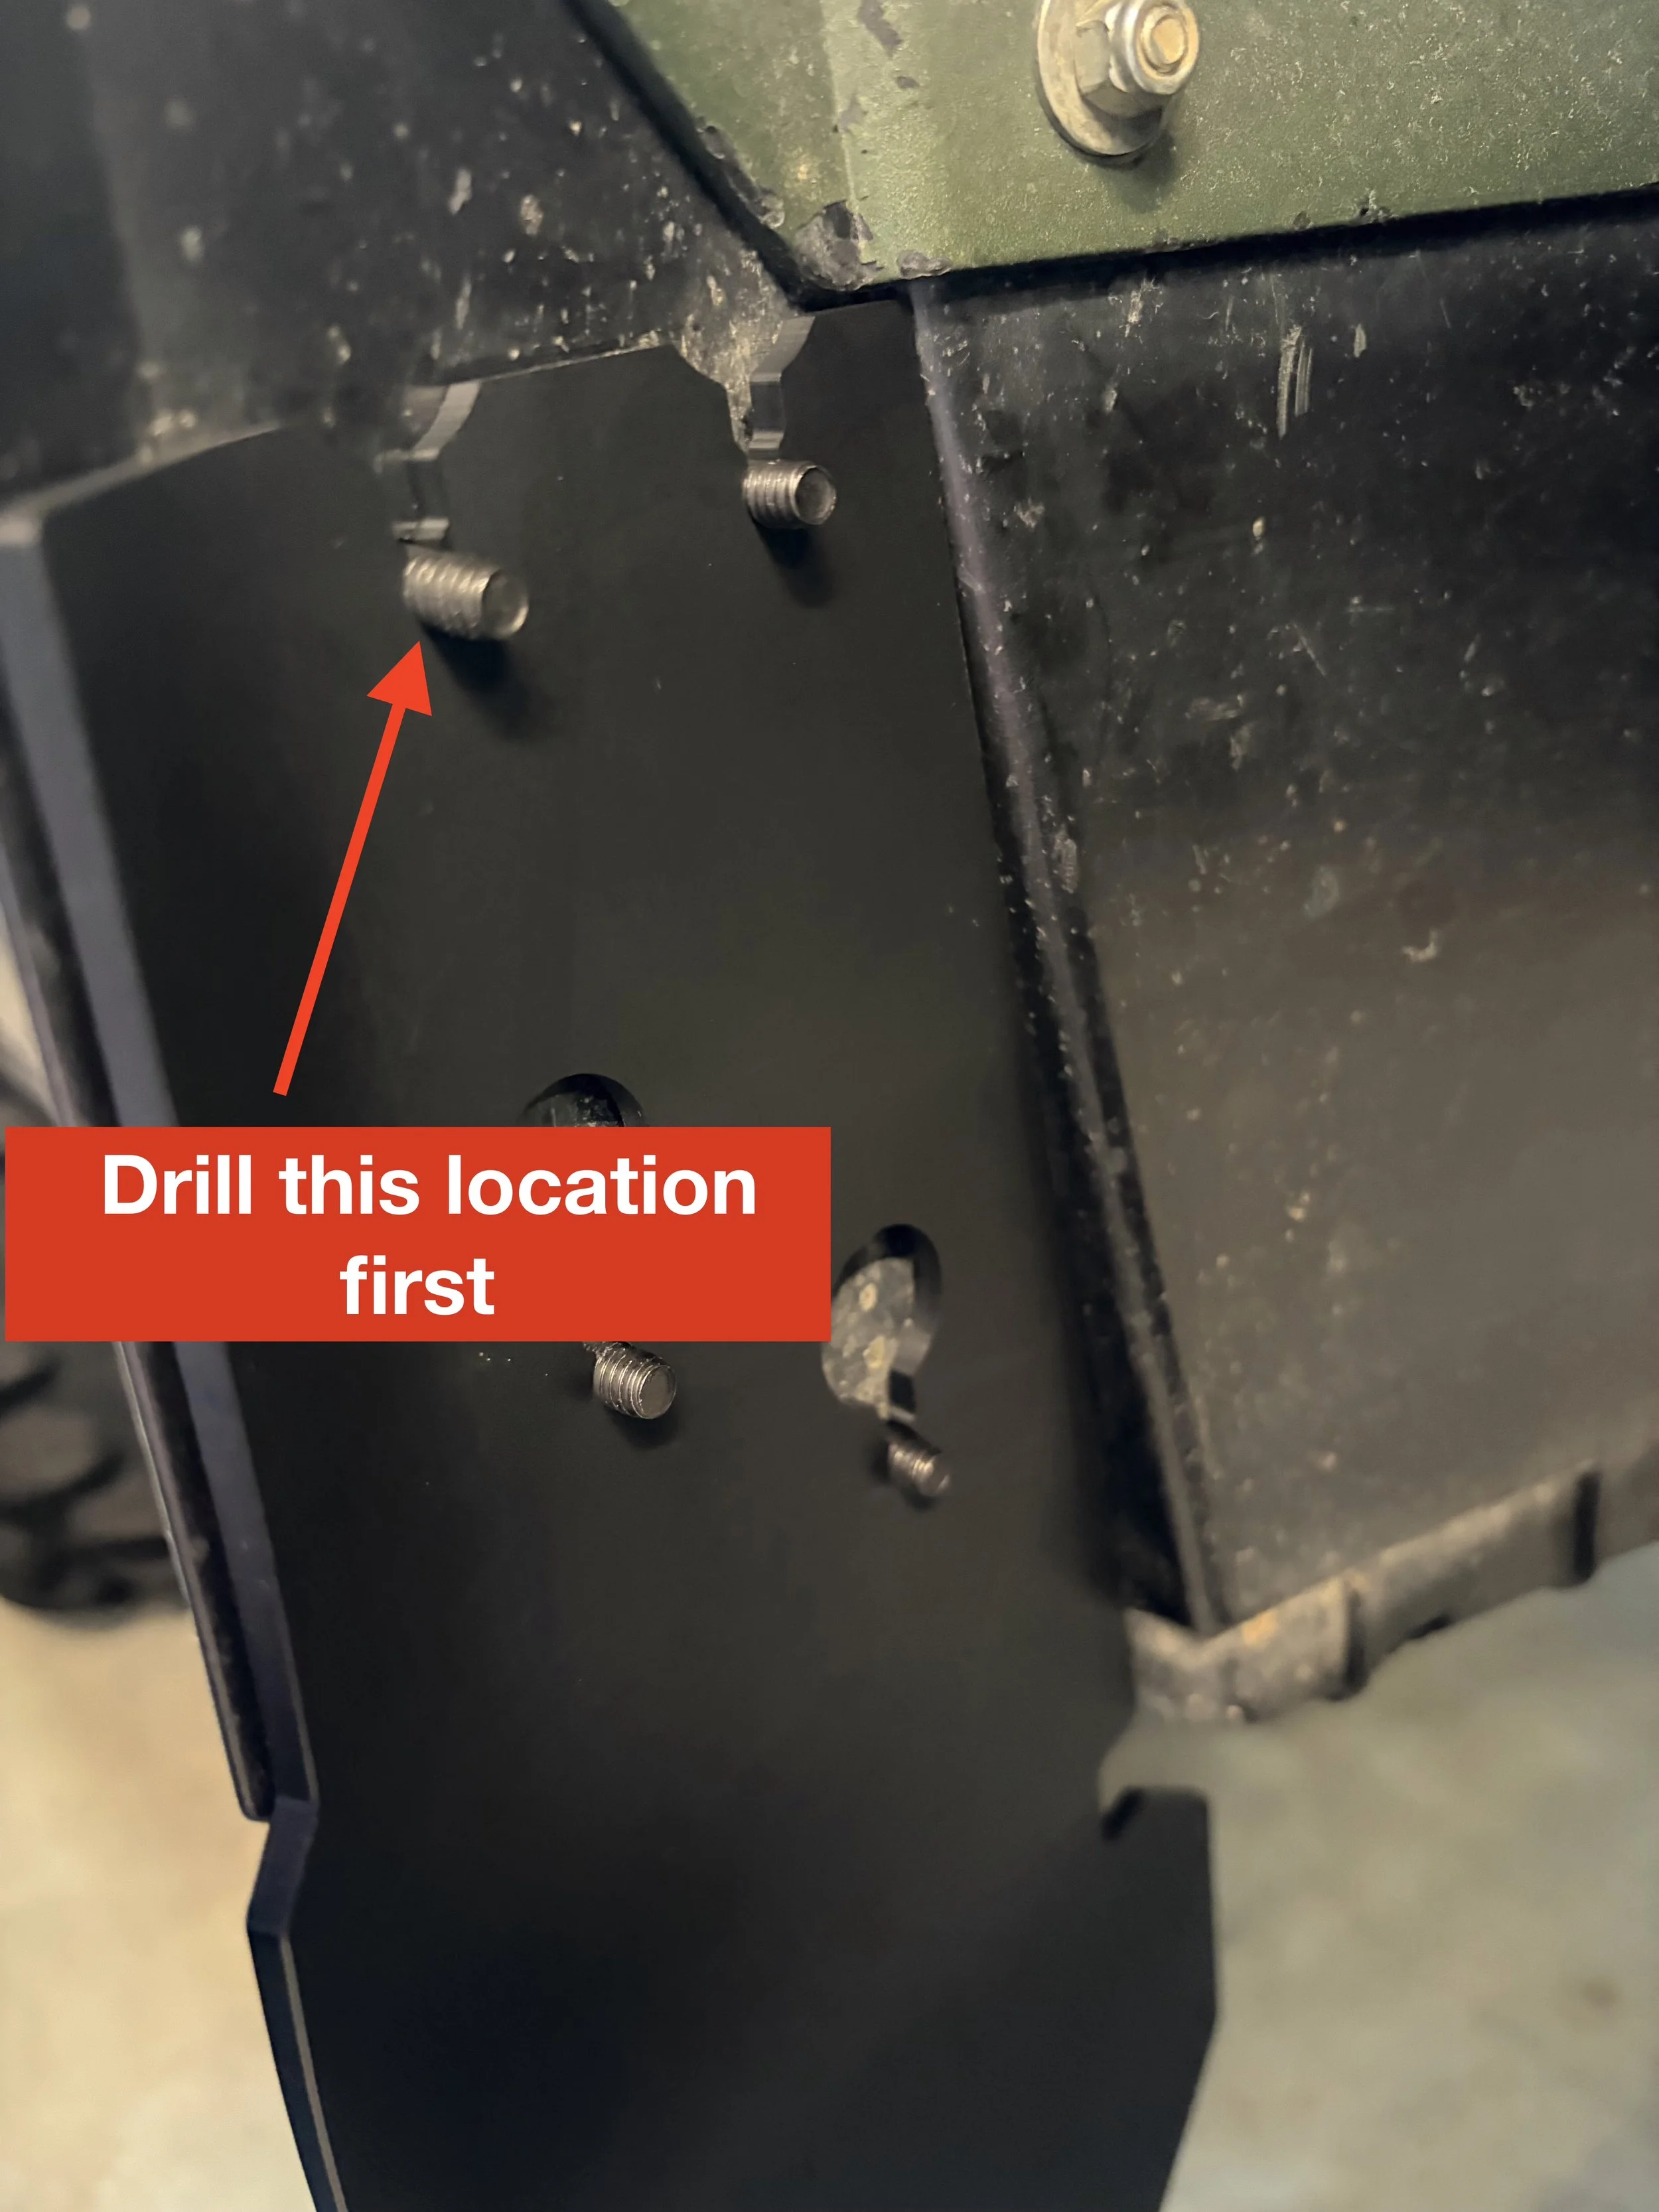
STEP 6
Using the 1/4” drill bit, prepare to drill the four installation holes. With the splash guard held firmly in place against the footwell, drill the first hole beginning with the upper left location shown in the picture below. Before drilling, be sure to position the drill bit into the lower section of the installation hole.
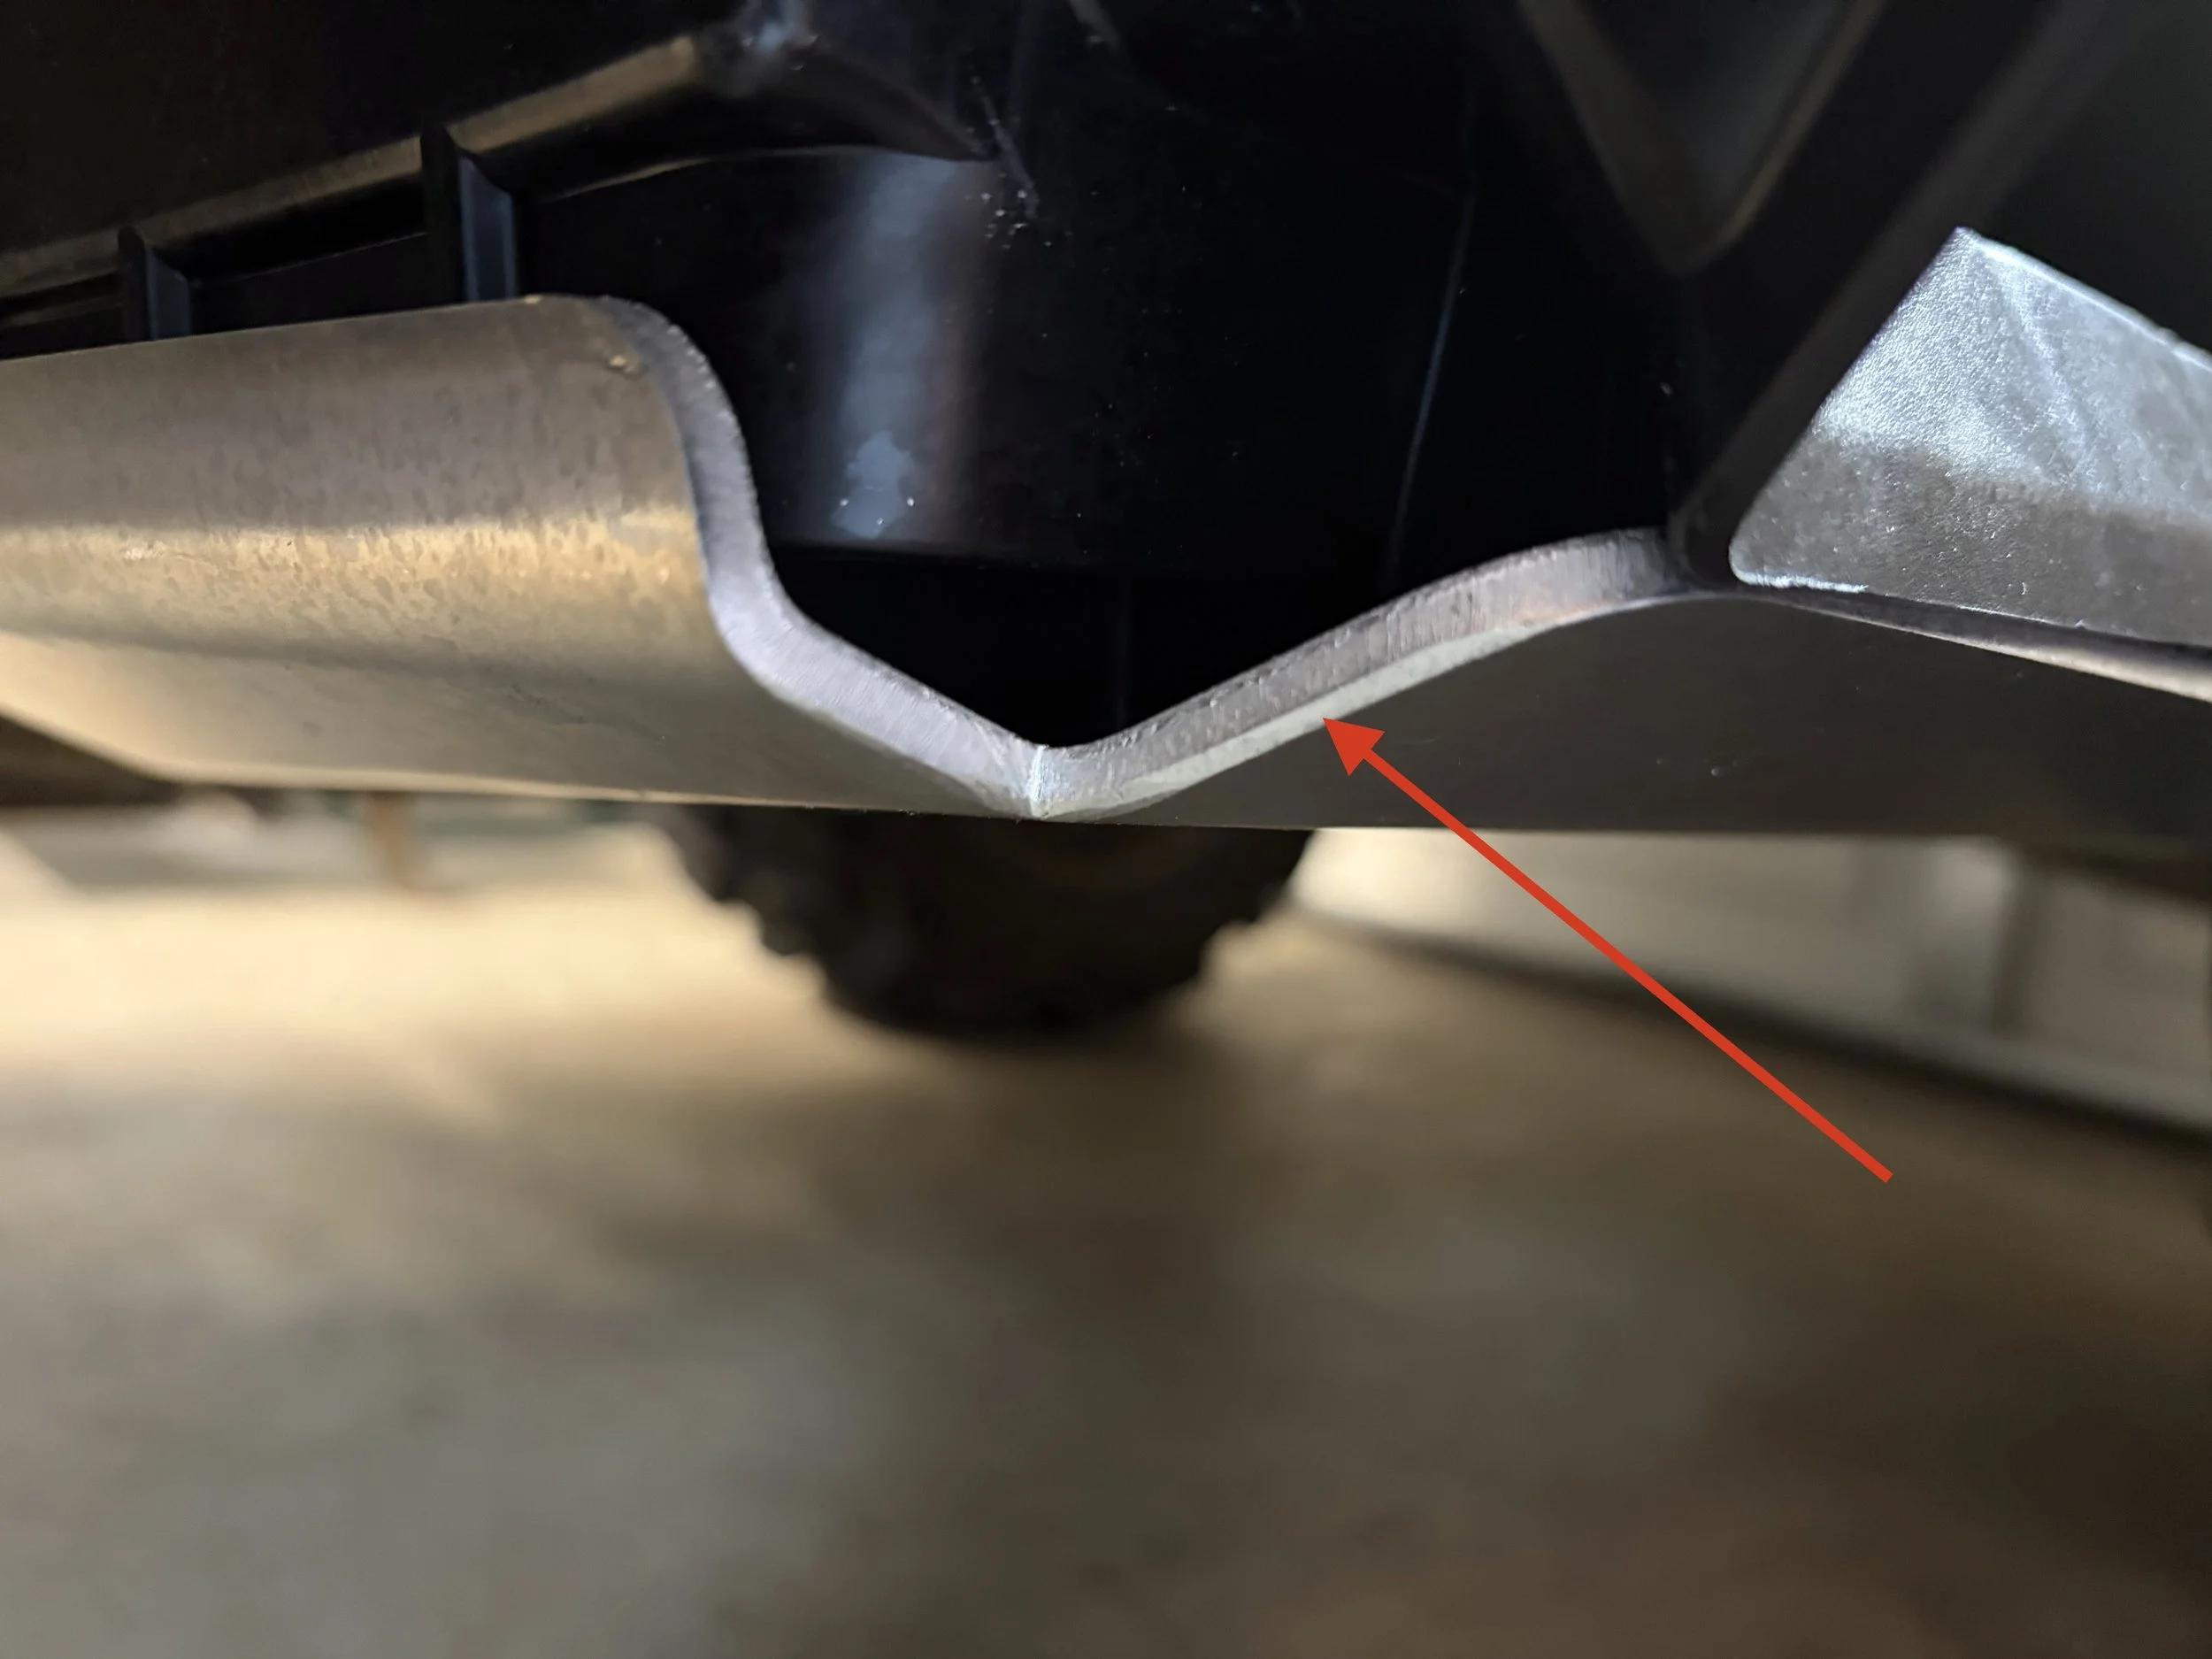
Important: Note the the installation holes in the splash guards have a unique shape/design. The splash guards are designed to pull down and free from the fenders under rough conditions that may pinch the splash guard between an object (tree, rock, etc) and the tire. This feature is to help prevent accidental damage to the footwell and/or fenders, but it cannot be guaranteed to function in all conditions. Install and use the splash guards at your own risk.
STEP 7
With the first hole drilled, secure the splash guard to the footwell using a bolt, nut, and washer. ***DO NOT OVER TIGHTEN THE NUT. ONLY TIGHTEN JUST ENOUGH TO SECURE THE SPLASH GUARD IN PLACE. MORE ON THIS LATER.*** This will help keep the splash guard perfectly placed for drilling the remaining holes.
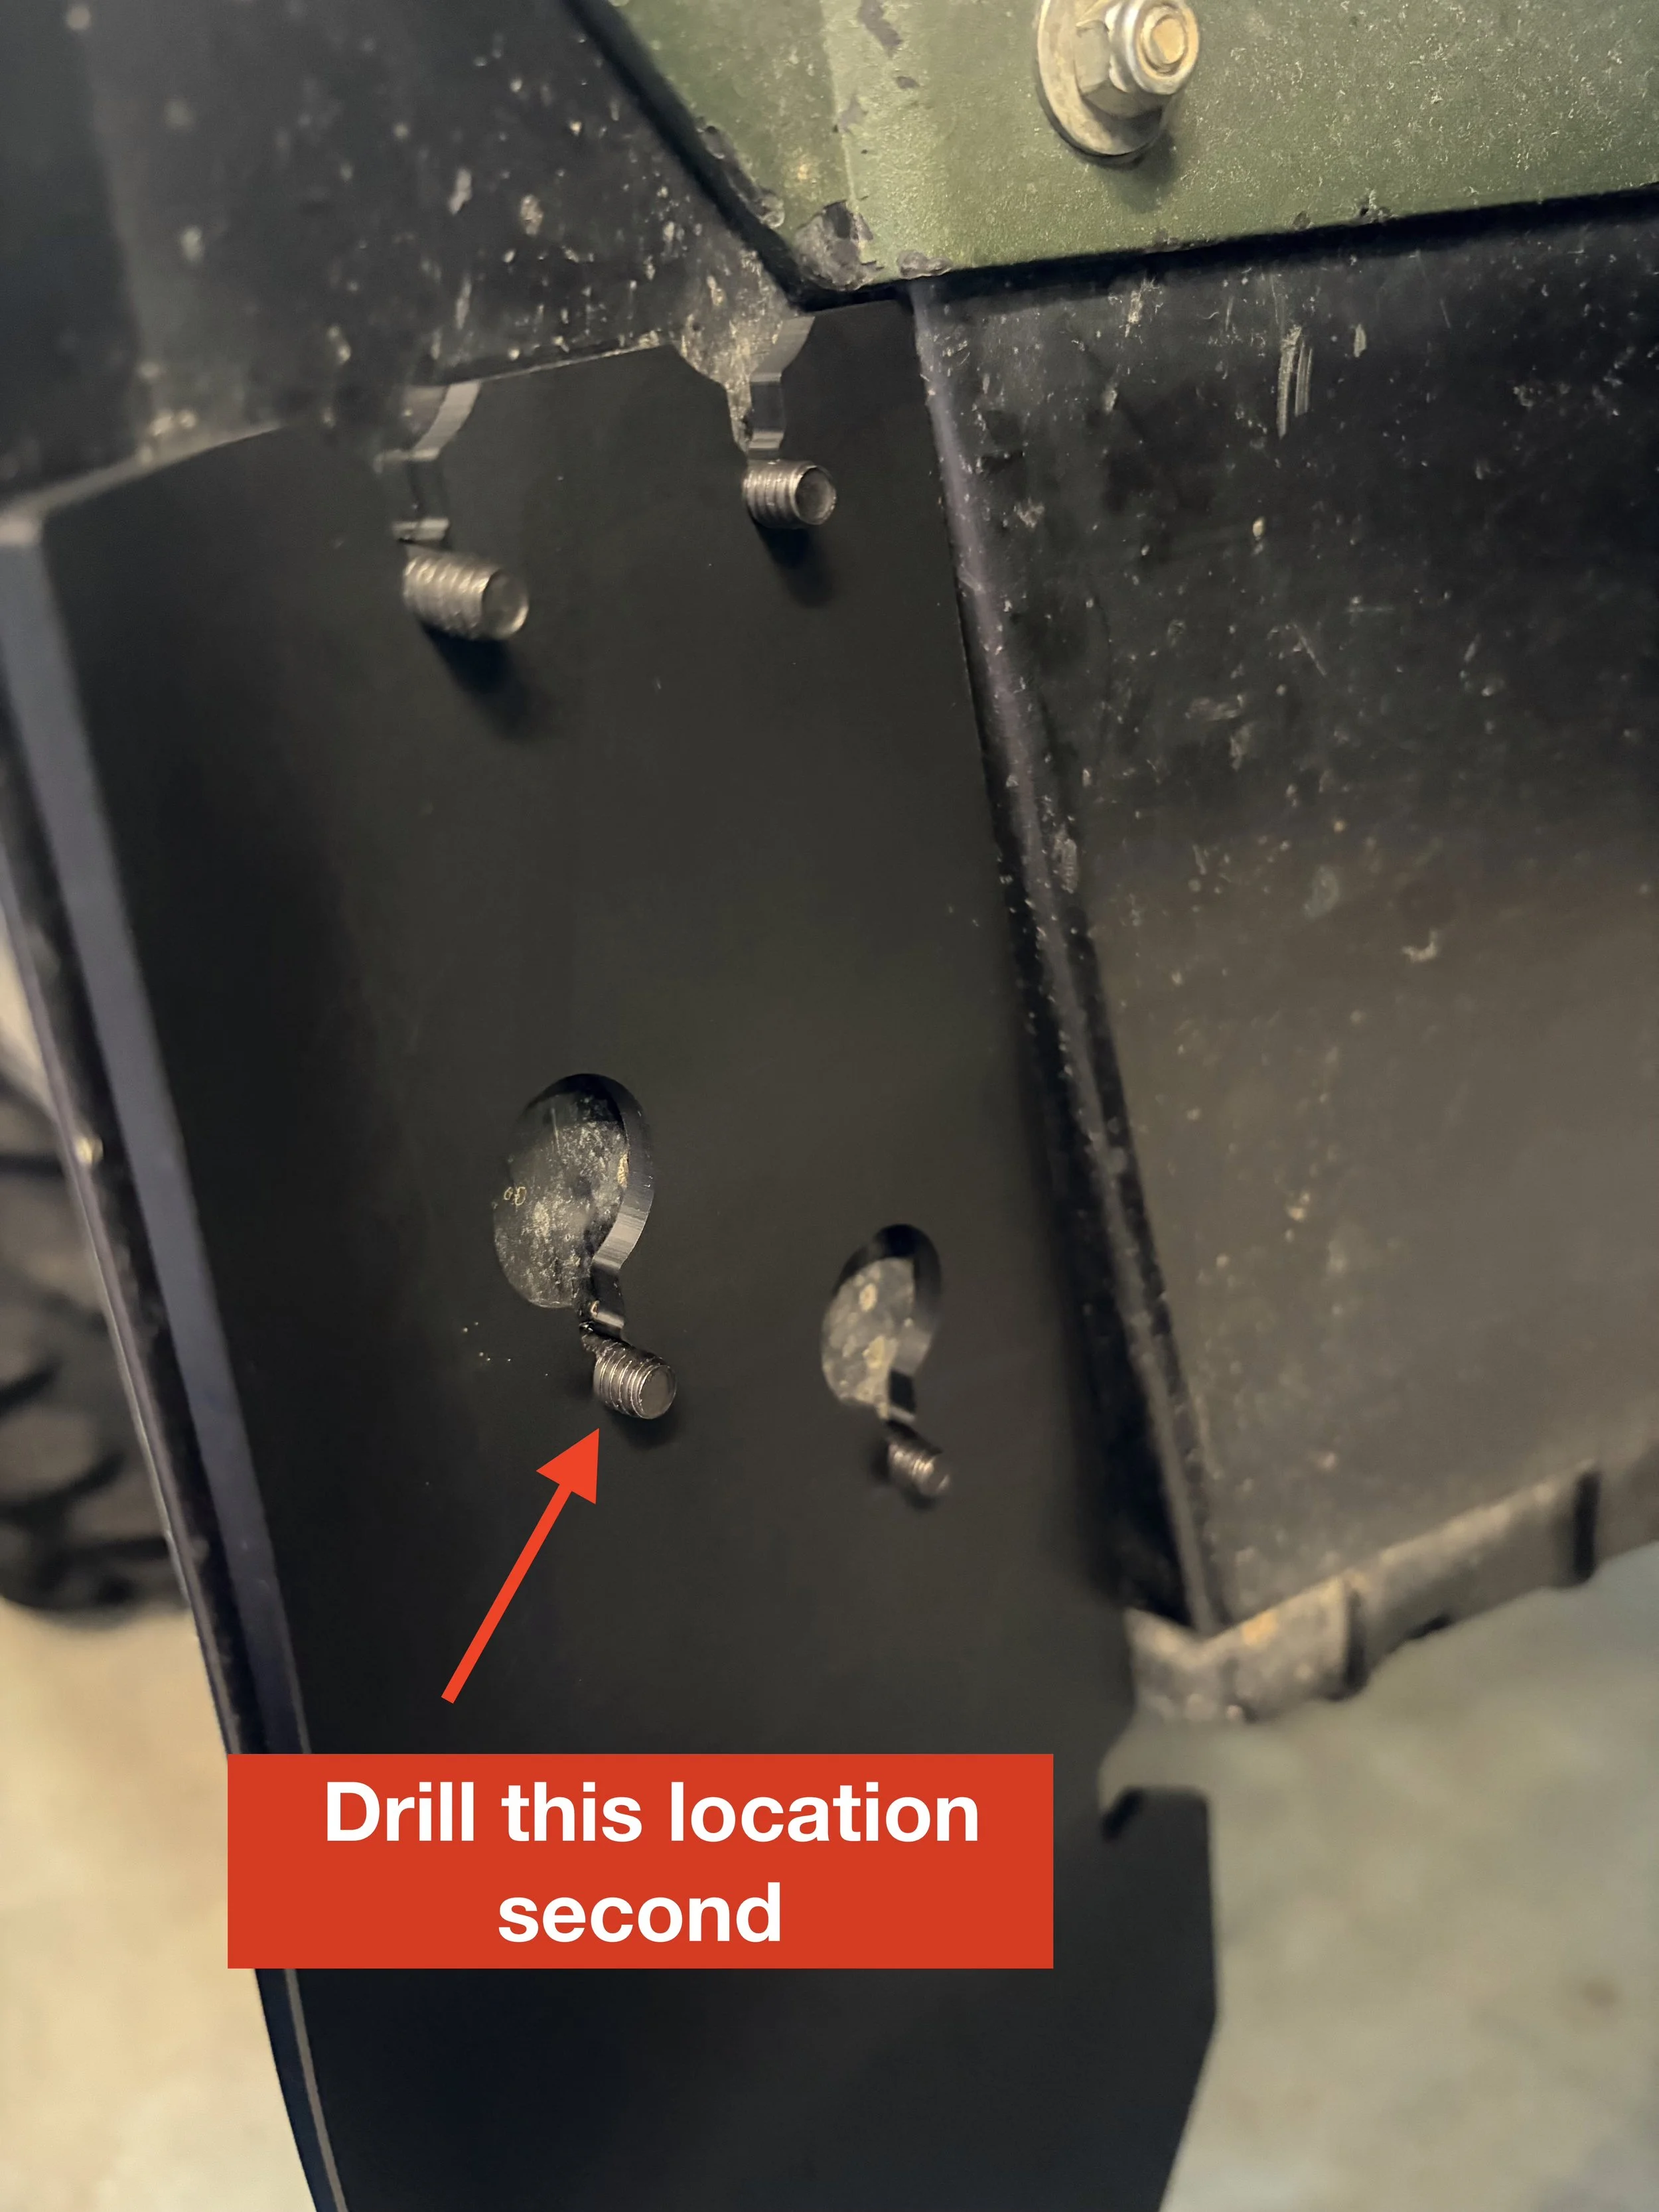
STEP 8
Press the splash guard firmly against the footwell again and drill the second hole as shown below.
STEP 9
Install the second bolt, nut, and washer. ONCE AGAIN, DO NOT OVER TIGHTEN.
Step 10
Drill the remaining two holes (order doesn't matter here). Install the last two sets of bolts, nuts, and washers BEING CAREFUL NOT TO OVER TIGHTEN.
STEP 11
***CRITICAL STEP. As mentioned earlier, the splash guards are designed to tear-away from the footwells to prevent potential damage to the ATV should they become pinched between an object and the tire. This will generally ONLY be an issue when reversing the ATV. To help ensure the splash guards are able to release from the footwells, the bolts and nuts MUST NOT BE IN AN OVERLY TIGHT POSITION. After the bolts, nuts, and washers are installed, the nut should be LOCKED onto the bolt with its nylon locking threads, but still installed loosely enough that the nut/bolt assembly can be rotated by hand. If necessary, back the nut off the bolt until you can just begin to freely rotate the entire nut/bolt assembly by hand. This will give the splash guards the best chance to slip down and off the bolts should they become pinched during operation.
STEP 12
Repeat steps 1-9 for the other splash guard. Reinstall your wheels and enjoy your new splash guards!